|
- The acrylic
or Perspex is heated in the oven until it is soft and malleable.
- The female part
of the former, which is called the yoke, is pushed onto the male plug.
- It is essential
that the two parts of the former align properly. In order to ensure
this two dowel rods called locating pins. These are fixed into holes
drilled into the corners of the plug. The pins also fit into holes drilled
into the yoke.
- The draw is the
amount of plastic that is pulled down to form the sides of the plastic
tray or plate.
- The size of the
plastic sheet used needs to allow for the depth of the draw.
The
stages of press forming and using a Plug and Yoke.
- When the plastic
sheet has been heated so that it is pliable it is placed or draped over
the plug.
- The yoke is then
pressed down over the plug and is held in position by attaching g-cramps
until the plastic sheet cools and 'freezes' in the newly formed shape.
- The plastic can
then be removed and the edges can be trimmed and edge treated.
- The image in this
unit shows the finished plastic tray.
|

The plug and yoke
cramped in position
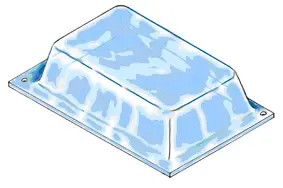
The finished press-formed
product
|

